Hit 90–98% MDD: Backfill and Compaction Specs for Contractors
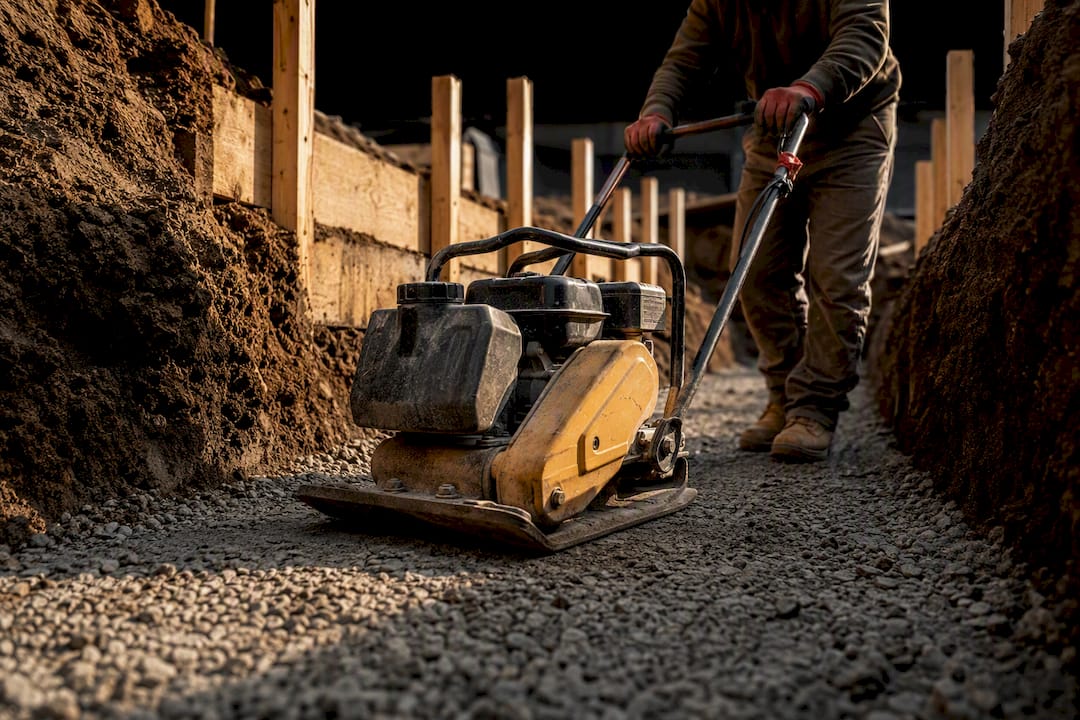
Target 90 to 95 percent of Maximum Dry Density for utility trenches and foundation backfill, and 95 to 98 percent for pavements and structural pads, always measured against a stated ASTM Proctor test. Getting there depends on three things: the right material, moisture within about 2 to 3 percent of optimum, and lift thickness matched to your compaction equipment. Miss any one of the three and the density number won’t happen no matter how many passes you run.
TL;DR:
- Use the correct Proctor test (D698 or D1557) specified in the geotechnical report to accurately assess maximum dry density and ensure proper compaction levels.
- Maintain lift thickness within specified limits: 6 to 8 inches for hand tools, 8 to 12 inches for vibratory equipment, and thinner on clay or confined zones to prevent bridging and achieve consistent density.
- Control moisture content within 2 to 3 percent of optimum to enable effective compaction, avoiding problems caused by overly dry, wet, or frozen soils.
- Prioritize properly staged, thin lifts around pipes, with bedding and haunch zones compacted in specific sequences to prevent pipe failure or settlement issues.
- Incorporate detailed testing frequency, documentation, and retest protocols into project specifications to avoid costly rework and ensure full compliance.
Table of Contents
- What Percent Compaction Actually Means
- Choosing the Right Backfill Material
- How Thick Should Each Compacted Lift Be?
- Getting Moisture and Site Prep Right Before You Compact
- Field Testing Methods, Frequency, and What to Do When a Test Fails
- Pipe Bedding and Trench Compaction: Where Most Failures Happen
- Sample Spec Language You Can Paste Into Submittals
- Field Checklists From Cornelius Wrecking’s Excavation Crews
- Why Skipping QA Costs More Than Doing It Right
- Get a Site Evaluation From Cornelius Wrecking
- Sources
What Percent Compaction Actually Means
“95 percent compaction” is meaningless without knowing 95 percent of what. Every percent compaction figure is a ratio against a laboratory reference value called Maximum Dry Density, and that reference value changes depending on which test produced it.
Maximum Dry Density (MDD) is the highest dry unit weight a specific soil can reach under a defined compactive effort in a lab mold. Optimum Moisture Content (OMC) is the water content at which that peak density occurs. Add too little water and particles won’t slide into place. Add too much and water fills the voids you’re trying to eliminate, so density actually drops. The relationship plots as a curve, and the peak of that curve is the number every field test gets compared against.
The two lab tests that generate this curve are not interchangeable, and mixing them up is one of the most common spec disputes on a job site.
- ASTM D698 (Standard Proctor) uses a lighter hammer and lower compactive energy, producing a lower MDD.
- ASTM D1557 (Modified Proctor) simulates heavier field equipment and modern loading, producing a higher MDD, sometimes 5 to 10 percent higher for the same soil.
That gap matters because “95% of Modified” represents a genuinely denser, stronger fill than “95% of Standard” on identical material. A geotechnical report that specifies D1557 and a contractor who tests against D698 numbers will show compliance on paper while the actual soil underperforms in the field.
Typical numeric ranges you’ll see across projects:
- Utility trench and foundation backfill: 90 to 95 percent MDD
- Pavement subgrade and structural fill: 95 to 98 percent MDD
- Under slabs and footings: frequently 95 percent minimum, sometimes tied to Modified Proctor specifically because of the load
Before mobilizing equipment, confirm which Proctor test the contract documents or geotechnical report actually cite. It’s usually buried in the earthwork section or an appendix, and it should never be assumed.
Choosing the Right Backfill Material
Material choice determines whether you’re fighting the soil or working with it. Well-graded granular material such as crushed stone, pea gravel, or coarse sand compacts predictably, drains well, and tolerates moisture swings without much drama. That’s why most specs push granular fill hard for zones near foundations, under slabs, and in pipe trenches.
Cohesive clays, by contrast, are notoriously moisture-sensitive. A clay that compacts beautifully at 14 percent moisture can turn to soup at 18 percent and refuse to densify at 9 percent. Organic soils, topsoil, debris, and frozen clods are rejected outright in nearly every spec because they compress or decompose over time, creating settlement long after the project closes out.
Here’s the general material hierarchy field crews should default to:
- Preferred near structures: well-graded gravel, crushed stone, coarse sand
- Acceptable with moisture control: select on-site granular soils meeting gradation limits
- Rejected: expansive clay, topsoil, organics, construction debris, frozen material
- Special case: CLSM (flowable fill) for restricted-access zones
CLSM, or Controlled Low-Strength Material, is self-consolidating flowable fill that eliminates the need for lift-by-lift mechanical compaction entirely. It’s the right call when access is too tight for compaction equipment, when vibration risks damaging an adjacent structure, or when long-term settlement tolerance is near zero, such as under a critical utility crossing. The trade-off is cost per cubic yard, which typically runs well above granular backfill, so CLSM gets specified selectively rather than universally.
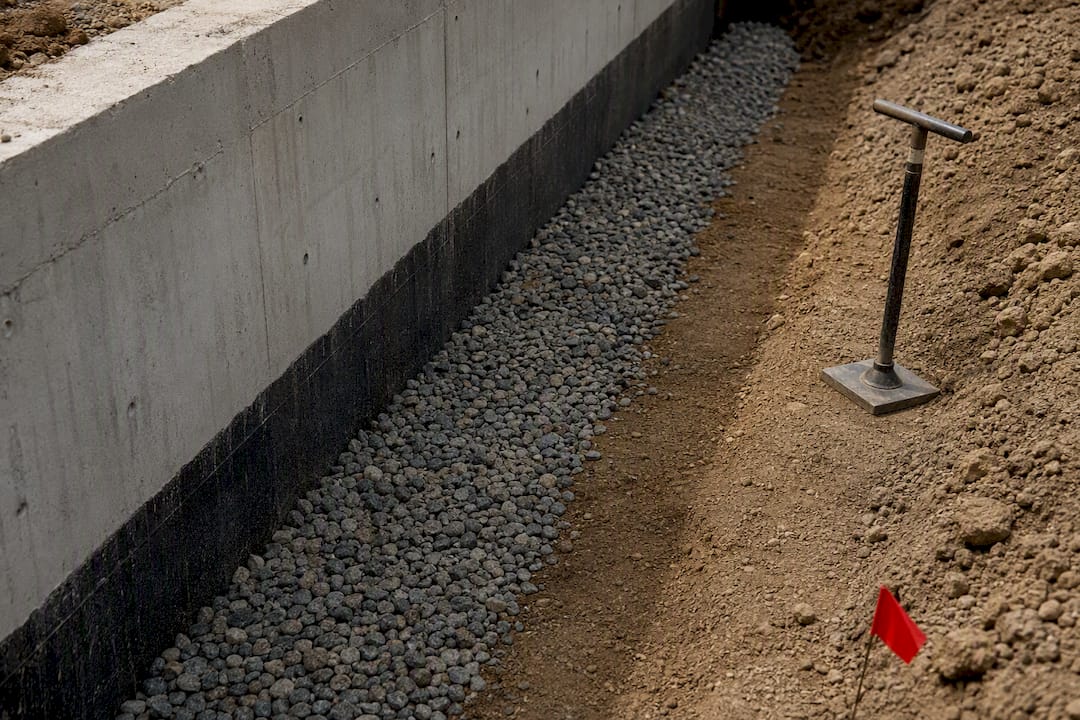
Drainage matters as much as density near below-grade walls. A drainage blanket or gravel column against the foundation wall, paired with hand-compacted granular fill outside that column, manages hydrostatic pressure without overloading the wall during compaction. Skip the drainage layer and you’re setting up a future waterproofing failure even if the compaction numbers pass.
Pro Tip: Keep a gradation sample and Proctor curve on file for every borrow source before it shows up on site. Swapping pits mid-project without a new Proctor is one of the fastest ways to fail a density test for reasons that have nothing to do with your compaction technique.
How Thick Should Each Compacted Lift Be?
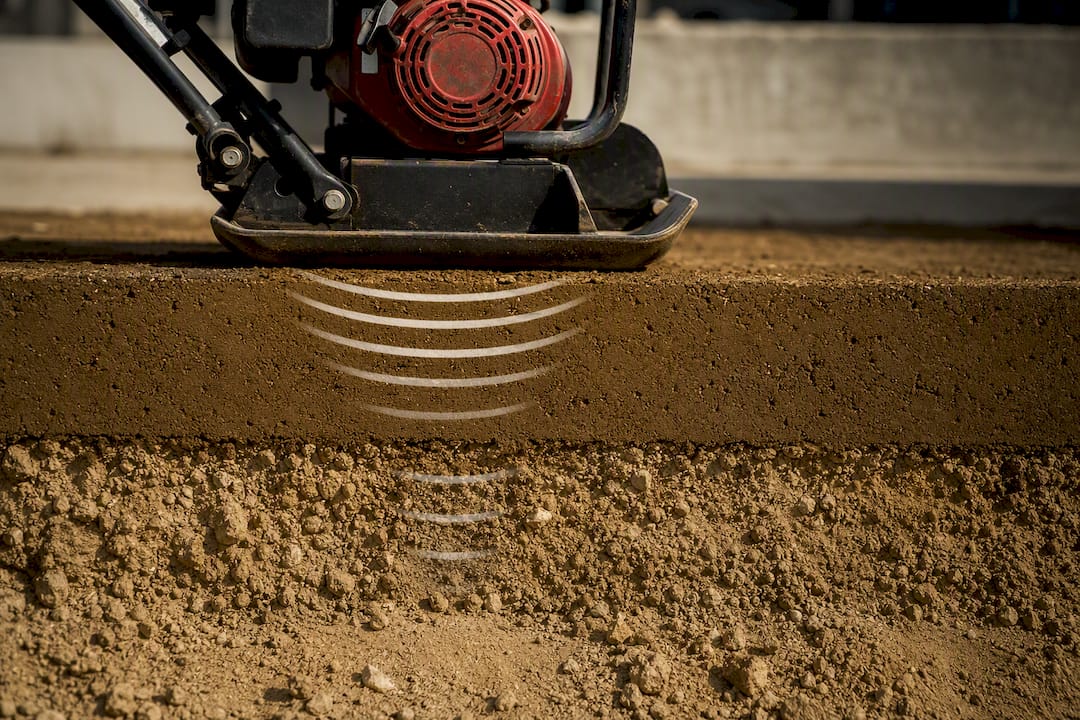
Lift thickness is the single most under-respected variable in backfill work. Compaction energy dissipates with depth, so a lift that’s too thick will read dense at the surface and loose six inches down, and no amount of extra passes fixes that. Get the lift-to-equipment match right and everything downstream, including your test results, gets easier.
- Hand-operated plate compactors and jumping jacks: limit loose lift thickness to 6 to 8 inches. These tools deliver lower energy, so thinner lifts are the only way to reach full-depth density in confined trenches and utility zones.
- Vibratory plates and rollers on open granular fill: 8 to 12 inches loose lift is typical, assuming a machine with adequate weight and vibration frequency for the soil type.
- Cohesive clay lifts: cut thickness further, often to 6 inches or less, and switch to a sheepsfoot or padfoot roller. The kneading action of a sheepsfoot foot breaks up clay clods in a way smooth-drum vibratory rollers cannot, and thin lifts on clay are cheaper than repeated failed passes on a too-thick lift.
- Narrow trenches and confined excavations: rammers (jumping jacks) remain the standard because vibratory rollers and larger plates simply don’t fit or can’t apply lateral force against trench walls effectively.
- Zones within roughly 10 feet of foundations or structures: switch to lighter hand-guided equipment. Municipal specs commonly restrict heavy vibratory rollers from operating in close proximity to a foundation wall because vibration transmitted through the soil can crack green concrete or shift forms that haven’t fully cured.
Lift thickness, pass count, and machine weight function as a system, not three separate variables. A heavier roller compensates for a slightly thicker lift; a lighter hand tool demands a thinner one. Four passes with a 3,000-pound plate compactor on a 10-inch clay lift will still likely underperform two passes with a properly sized sheepsfoot on a 6-inch lift, because the clay simply won’t transmit that energy downward without the kneading action.
Watch for “bridging,” where the top two or three inches of a lift compact hard and shed vibration energy before it reaches depth. If a nuclear gauge reading looks great at 2 inches deep but a deeper probe or drive-cylinder sample shows loose material below, that’s bridging, and the fix is thinner lifts, not more passes on the same lift.
Getting Moisture and Site Prep Right Before You Compact
Moisture content controls whether compaction is even physically possible. Soil generally needs to sit within about 2 to 3 percent of optimum moisture content to hit target density, and outside that window, no amount of rolling or tamping will get you there.
Too dry, and granular particles won’t lubricate past each other into a denser arrangement. Too wet, and the soil behaves almost hydraulically. Water occupies pore space that should be filled with solid material, and heavy equipment can actually pump the soil and create rutting instead of compaction, a condition field crews call “pumping” or a “rubber” subgrade.
Practical conditioning steps that actually work:
- Dry soil: add water in controlled passes with a water truck, then disc or blade the material to distribute moisture evenly before compacting; don’t just puddle water on the surface and roll over it.
- Wet soil: aerate by disking or scarifying, let it sit exposed to sun and wind, or blend in drier material from an approved source.
- Standing water or saturated ruts: stop. Excavate and remove the wet material rather than trying to compact through it.
- Frozen ground or frozen clods: never compact over frozen material; it will thaw, lose volume, and settle regardless of the density reading you got that day.
Subgrade prep before the first lift goes down matters just as much as the lift itself. Strip organics and topsoil completely, probe for soft spots with a proof roll, and identify any zones needing an authorized undercut before backfill begins. A geotechnical engineer typically signs off on undercut depth and replacement material, and skipping that step to save a day of schedule is how soft spots reappear as pavement dips two winters later.
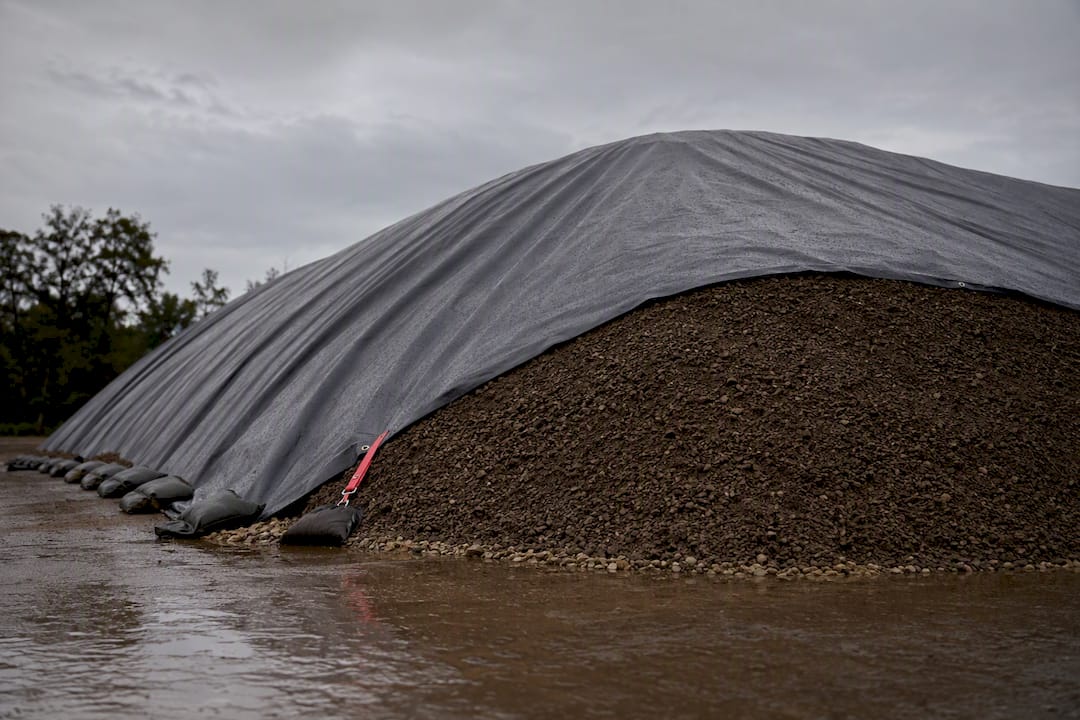
Stockpiled material needs cover if rain is in the forecast. A borrow pile that gains 4 percent moisture overnight from an unexpected storm can blow your moisture window for an entire day’s placement, and re-testing a rejected stockpile costs more time than tarping it would have.
Field Testing Methods, Frequency, and What to Do When a Test Fails
Three test methods dominate backfill and compaction QA, and each one fits a different situation on site.
The nuclear density gauge is the workhorse of modern compaction testing. It gives a density and moisture reading in under two minutes, which makes it the default for high-volume production work where a testing technician needs to clear multiple lifts a day. It requires a licensed operator and radioactive source handling protocols, and accuracy can suffer in highly variable or rocky material.
The sand cone test (ASTM D1556) is slower, usually 20 to 30 minutes per test, but it’s the reference method regulators and disputes fall back on because it measures actual excavated volume and weight rather than a calibrated radiation count. Many agencies require sand cone verification for a percentage of nuclear gauge tests as a check.
The drive cylinder test (ASTM D2937) works best in cohesive, rock-free soils where a thin-walled tube can be driven cleanly into the lift without disturbing the sample. It’s less common on rocky or granular sites where the tube can’t get a clean core.
| Test Method | Typical Time | Best For | Limitation |
|---|---|---|---|
| Nuclear density gauge | 1 to 2 minutes | High-volume production testing | Requires licensed operator, radioactive source |
| Sand cone (ASTM D1556) | 20 to 30 minutes | Reference/verification testing | Slow, labor-intensive |
| Drive cylinder (ASTM D2937) | 10 minutes | Cohesive, rock-free soils | Doesn’t work in gravelly or rocky fill |
Testing frequency isn’t arbitrary, and your geotechnical report should govern the final number, but common rules of thumb call for one test per 2,000 to 5,000 square feet per lift in open areas, or one test per 200 to 500 linear feet of trench per lift for utility work. Under foundations and footings, expect tighter spacing, sometimes one test per footing or per defined grid, because the consequence of a miss is so much higher there.
A compliant test report needs to show more than a pass/fail stamp. Inspectors and permit offices generally expect the location and elevation of each test, the lift number, moisture content at the time of test, dry density achieved, the percent compaction relative to the Proctor curve, and which Proctor test (D698 or D1557) the report references. Missing or incomplete reports are a common cause of delayed sign-off at final inspection, so a clean paper trail is worth as much as the compaction itself when it’s time to close out a permit.
When a test fails, the remedial sequence is straightforward:
- Re-scarify the failed lift and adjust moisture up or down based on the reported reading versus optimum.
- Re-compact with additional passes or a heavier machine if the equipment appears undersized for the material.
- Re-test at the same location once conditioning is complete.
- If a lift fails repeatedly, or if the failure suggests a material problem rather than a technique problem, escalate to the geotechnical engineer of record before placing another lift on top. Design-level judgment calls, including whether a failing zone needs full removal and replacement, belong with the geotech, not the field crew.
Pipe Bedding and Trench Compaction: Where Most Failures Happen
Trench backfill fails more often than open-area backfill, mostly because crews rush the zone directly around the pipe to keep production moving. That’s exactly the zone where a mistake causes the most expensive kind of failure: a cracked pipe, a washed-out bedding, or a settled trench line that telegraphs through pavement months later.
- Bedding placement first. Small-diameter pipe typically gets 4 to 6 inches of bedding material, usually clean crushed stone or sand, compacted to a specified percent (often 90 to 95 percent MDD) before the pipe ever goes in the trench. Larger pipe may need a deeper, engineered bedding cradle per the project drawings.
- Haunching and initial backfill in thin lifts. Material placed alongside and just above the pipe, commonly called the haunch zone, gets compacted in lifts no thicker than about 6 inches up to a specified height above the pipe crown, a limit that shows up consistently in municipal excavation specs. This zone gets hand-tamped or plate-compacted, never rolled with heavy equipment that could shift or crush the pipe.
- Final backfill above the pipe zone. Once you’ve cleared the defined protective zone above the pipe (often 12 to 24 inches depending on pipe material and diameter), normal lift thickness and equipment resume, matched to whatever material is going back into the trench.
- Sequencing to protect the pipe. Never backfill unevenly on one side of a pipe before the other; lateral pressure differential can roll or crack it. Keep hand-tamping zones strictly enforced until the crown clearance height is met, and document any equipment substitution before it happens, not after.
- Weight limits and undercuts. If native trench bottom material is too soft to support the specified bedding, it needs an authorized undercut and replacement with approved granular material before bedding placement begins, not a note added after the fact.
Sample Spec Language You Can Paste Into Submittals
Clean spec language up front saves an RFI cycle later. A basic compacted density clause reads something like: “Backfill shall be compacted to not less than 95 percent of maximum dry density as determined by ASTM D1557 (Modified Proctor), in lifts not exceeding 8 inches loose thickness, at moisture content within 2 percent of optimum.”
Real project specs go further, tying percent compaction to material type and zone location, and that level of specificity is what separates a spec that survives an audit from one that gets challenged.
A submittal package typically needs to include:
- Lift thickness and moisture conditioning requirements, stated separately for granular and cohesive material if both are used on the project.
- Testing frequency language, spelling out tests per lift, per area, or per linear foot, plus what triggers a retest.
- Retest obligations, specifying who pays for a failed test and re-mobilization, which prevents a schedule dispute later.
- Inspection hold points, meaning the contractor cannot place the next lift, pour a footing, or place pavement until the engineer or inspector signs off on the prior lift’s test results.
- Documentation deliverables, including the Proctor curve for each material source, daily compaction logs, and final test reports as part of closeout.
Anyone drafting or reviewing a construction consulting scope should treat these clauses as the baseline expectation rather than an upgrade, since disputes over compliance almost always trace back to vague or missing language in exactly these spots.
Field Checklists From Cornelius Wrecking’s Excavation Crews
A short checklist prevents most of the compaction failures that show up on a punch list. Before mobilizing, confirm: material approval and gradation report on file, a current Proctor submittal matching the actual borrow source, daily compaction logs signed by the field technician, and test certificates for the gauge or sand cone equipment in use.
Two operational habits reduce rework more than anything else. Staging approved borrow material near the work zone, covered against rain, keeps moisture predictable instead of reactive. Running a daily log workflow, Proctor submittal on day one, a scheduled test acceptance point roughly every third lift in open areas, and an immediate retest protocol on any failure, catches problems before they compound across multiple lifts.
- Confirm material approval and current Proctor before the first lift goes down.
- Log moisture and density readings daily, not just at project milestones.
- Keep OSHA excavation and trenching protections active on every open cut, and stay alert for suspected asbestos-containing material in older utility corridors or demolished structures before backfill begins.
- Stage equipment so heavy compaction machinery isn’t idling near open trenches longer than necessary.
Pro Tip: Assign one person on the crew to own the compaction log for the whole project, not a rotating rotation of whoever’s free. Consistency in how moisture and density readings get recorded catches drift in technique long before a test fails.
Why Skipping QA Costs More Than Doing It Right
Every dollar saved by skipping a Proctor submittal or stretching lift thickness tends to resurface later as a much bigger repair bill, usually after pavement or a slab has already gone in on top of the problem. Fixing settled backfill under finished work costs a multiple of what proper compaction would have cost during the original excavation.
Integrated QA, meaning testing built into the schedule rather than bolted on at the end, reduces closeout risk because problems surface while the crew and equipment are still mobilized on site. If you lead a project, build compaction testing frequency into your schedule of values before groundbreaking, not after the first failed test forces a change order.
— Zach
Get a Site Evaluation From Cornelius Wrecking
Cornelius Wrecking handles the excavation, trenching, and backfill work most contractors would rather subcontract out entirely, backed by OSHA and asbestos abatement certifications that matter the moment a project touches an older structure or a hazardous material scope. The advantage for project leads is straightforward: one crew handles demolition, mass earthwork, utility trenching, foundation excavation, and compaction QA documentation under a single contract, instead of coordinating separate demolition, excavation, and testing vendors on the same schedule.
Services include site clearing, mass earthwork, foundation excavation, utility trenching, and dump trucking for hauling debris and aggregates, alongside the demolition and abatement work the crew is built around. When you request a site evaluation, expect deliverables that make submittals easier: a Proctor submittal matched to your actual borrow material, and compaction test reports formatted for inspector and permit sign-off, not just a pass/fail note.
If your project needs excavation and backfill work paired with the compaction documentation your engineer will actually accept, start a site evaluation with Cornelius Wrecking and get scope and testing requirements settled before equipment mobilizes.
Sources
Planning a demolition or excavating project?
Get a fast, no-obligation quote from Cornelius Wrecking.
Request a Quote